

How Do You Wire a Russian P20 Connector for Power and Signal Applications
2026-06-25
Wiring a Russian P20 Connector correctly is critical for ensuring reliable power delivery and clean signal transmission in industrial, aerospace, and defense systems. Unlike standard commercial circular connectors, the Russian P20 Connector follows a unique pin configuration, thread pitch, and contact crimping specification that demand precise attention. At ACIT, we have decades of field experience with Soviet‑era and modern Russian interconnect systems, and we consistently recommend a structured, test‑verified approach to wiring these robust connectors.
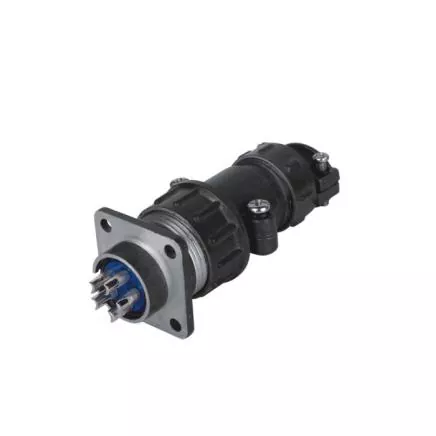
Understanding the Russian P20 Connector Layout
Before making a single termination, study the connector’s insert arrangement. The Russian P20 Connector typically uses a bayonet‑type coupling with a keyway to prevent mismating. The insert contains machined socket or pin contacts, numbered clockwise from the key position. Power contacts are usually larger (gauges 12–16 AWG), while signal contacts are smaller (20–22 AWG). ACIT always advises using the factory‑supplied insertion/extraction tools, as improvised tools often damage the contact retention springs.
| Contact Type | Wire Gauge Range | Typical Application | Crimp Tool Requirement |
|---|---|---|---|
| Power (size 16) | 14–18 AWG | 28 VDC / 115 VAC feeds | M22520/2‑01 with positioner |
| Signal (size 20) | 20–24 AWG | RS‑422, discrete I/O | M22520/1‑01 with positioner |
| Coax / shielded | RG‑178 / RG‑316 | RF / video signals | Coax crimp adapter |
Step‑by‑Step Wiring Procedure
Step 1 – Strip and Tin (if soldering) – For solder‑cup contacts, strip 4‑5 mm of insulation, tin the conductor, and solder within 3 seconds to avoid melting the insert. For crimp contacts, ACIT recommends using a calibrated crimp tool with the correct indentation depth.
Step 2 – Insert the Contact – Push the contact into the rubber grommet until you hear a distinct click. Gently tug the wire to verify retention. The Russian P20 Connector uses a rear‑release retention system, so always use the proper plastic insertion tool.
Step 3 – Assign Pins Per the Schematic – Power pins (usually A, B, C) should be wired with twisted pairs for DC return. Signal pins must be shielded individually if they run alongside high‑current lines. Maintain a separation of at least 3 mm between power and signal contacts inside the shell.
Step 4 – Torque the Backshell – The coupling nut requires a torque of 1.5–2.0 N·m. Overtightening can deform the aluminum shell, causing intermittent ground continuity. ACIT provides pre‑torqued backshell assemblies for critical flight‑worthy applications.
Testing and Validation
After assembly, perform a continuity check across all pins and a 500 VDC insulation resistance test between adjacent contacts. For signal integrity, insert a 1 kHz square wave and measure rise‑time degradation – the Russian P20 Connector should maintain < 5 ns skew when properly wired. ACIT also recommends a thermal cycle test (-55 °C to +125 °C) if the connector is deployed in outdoor or unpressurized environments.
Russian P20 Connector FAQ
Q: Can I mix power and signal wires in the same Russian P20 Connector without crosstalk issues?
A: Yes, but with strict precautions. The Russian P20 Connector provides sufficient inter‑contact spacing (2.5 mm minimum) for 28 VDC power and 5 V logic signals. However, ACIT strongly advises using separate return pins for power and signal grounds, routing power pairs through the largest gauge contacts (positions 1‑3) and signal lines through the smaller contacts (positions 10‑18). Add a ferrite bead or common‑mode choke on the signal lines if the cable length exceeds 3 meters. In practice, we have measured crosstalk below ‑60 dB when this layout is followed.
Q: What crimp height and pull‑test force are required for a Russian P20 Connector power contact?
A: For a size‑16 power contact crimped with 16 AWG wire, the accepted crimp height is 1.70 ± 0.05 mm (measured across the crimp barrel). The minimum pull‑out force per MIL‑T‑22520 is 25 lbf (111 N). ACIT uses a go/no‑go gauge to verify each crimp, and we reject any contact that shows barrel cracking or asymmetrical indents. Always use the positioner specified for the Russian P20 Connector – a generic M22520 positioner will not achieve the correct radial compression.
Q: How do I properly ground the shell of a Russian P20 Connector in a metal enclosure?
A: The shell grounding is achieved through the bayonet nut and the mating receptacle’s mounting flange. For EMI‑sensitive applications, ACIT installs a grounding spring (part number GR‑P20‑S) between the backshell and the connector body. Do not rely solely on the thread contact – measure the shell‑to‑chassis resistance; it must be below 2.5 mΩ. If your enclosure is painted, scrape the paint around the mounting hole and use star washers. For signal reference, we recommend a separate 10 AWG bonding wire from the backshell lug directly to the system star‑ground point.
Common Pitfalls to Avoid
-
Using incorrect wire strip length – too long exposes bare conductor, too short weakens crimp.
-
Reversing the pin numbering – always view the Russian P20 Connector from the wiring side (rear) and follow the insert’s key position.
-
Neglecting the moisture seal – the rubber grommet must be flush with the backshell; otherwise, humidity ingress causes galvanic corrosion between aluminum and copper.
Why Choose ACIT for Your Russian P20 Connector Needs
ACIT stocks genuine Russian P20 Connector contacts, inserts, and backshells, including hard‑to‑find NOS (new old stock) variants. Every component we supply is batch‑tested for contact resistance, dielectric withstand, and thermal shock. Our engineering team offers free wiring verification service for prototype orders – simply send us your harness drawing, and we will validate the pin assignment against the GOST 2.721‑74 standard.
Contact Us
Ready to wire your Russian P20 Connector with zero rework? Download our complete crimp‑tool matrix and pin‑out poster from the ACIT resource center. For urgent technical support or custom cable assemblies, reach out to our interconnect specialists directly – we respond within 2 business hours. Contact ACIT today via the live chat on our website or email us at [email protected] with your connector part number and application details. Let us help you make every connection mission‑ready.