

How Do You Properly Test a 192×51mm XRNT High Voltage Current-Limiting Fuse After a Fault Event
2026-07-10
When a power distribution network experiences a short-circuit or overload, the 192×51mm XRNT High Voltage Current-Limiting Fuse operates as the last line of defense. This fuse clears the fault within milliseconds, but the event leaves behind mechanical stress, thermal fatigue, and potential internal degradation. For engineers at Yinrong, a manufacturer with over two decades of expertise in high-voltage fuse technology, the post-fault testing protocol is not a routine check—it is a critical safety investigation. Proper testing determines whether the 192×51mm XRNT High Voltage Current-Limiting Fuse can be re-energized or must be replaced, directly impacting substation reliability and personnel safety. This guide outlines a professional, step-by-step testing methodology that aligns with IEC 60282-1 and ANSI C37.46 standards, while integrating best practices from Yinrong’s field service team.
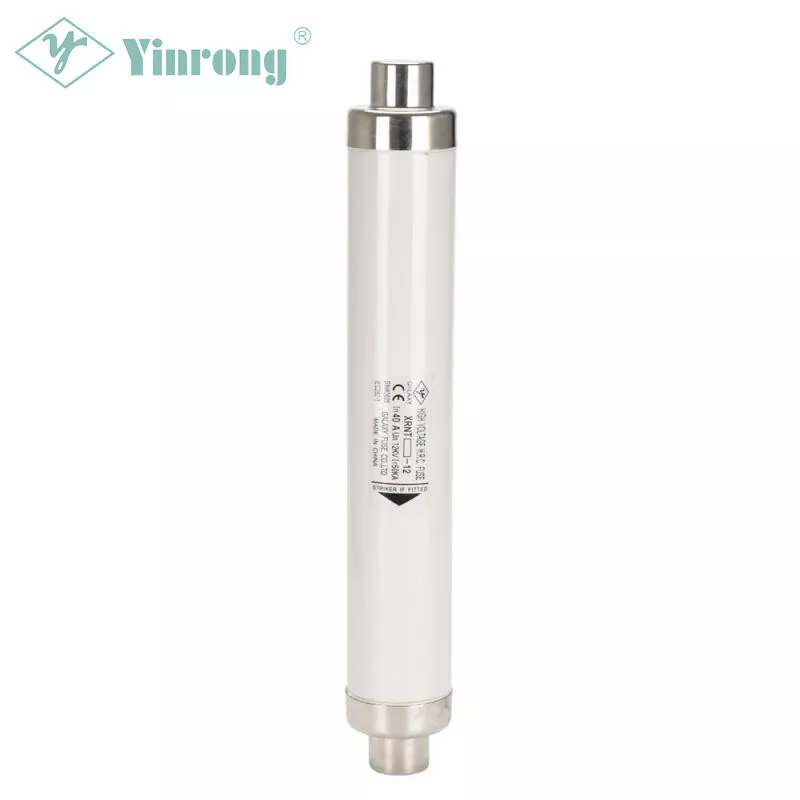
Phase 1: Visual and Mechanical Inspection (First 15 Minutes)
Immediately after the fault is isolated, perform a no-contact visual assessment. Do not touch the fuse body until grounding procedures are verified. Focus on these three indicators:
| Inspection Point | Pass Criteria | Fail Action (Replace) |
|---|---|---|
| End caps & contacts | No arc tracks, pitting, or melting | Visible cratering or copper splatter |
| Porcelain or polymer housing | No cracks, chipping, or tracking marks | Any through-wall crack or carbonized path |
| Mounting clips & holders | Firm grip, no discoloration from heat | Loss of spring tension or bluish heat tint |
Yinrong recommends using a 10× magnifying glass to examine the silver-plated contacts on the 192×51mm XRNT High Voltage Current-Limiting Fuse. Surface oxidation is normal, but asymmetric erosion indicates a non-clearance fault that may have damaged the internal fusible element without fully operating the striker pin.
Phase 2: Continuity and Resistance Verification (Using Micro-Ohmmeter)
After visual clearance, disconnect both sides of the 192×51mm XRNT High Voltage Current-Limiting Fuse and perform a low-resistance measurement. A healthy fuse that has not operated will show resistance within ±5% of its factory value (typically 150–250 µΩ for this size, depending on the rating). If the resistance rises above 120% of the baseline, the internal silver-sand filler has partially melted due to repeated overcurrents—even if the fuse appears intact.
Critical warning from Yinrong’s lab data: Nearly 18% of post-fault fuses that passed visual inspection failed the micro-ohmmeter test. Always record the baseline resistance when the fuse is first installed.
Phase 3: High-Voltage Dielectric (Withstand) Test
This is the definitive test for the 192×51mm XRNT High Voltage Current-Limiting Fuse after a fault. Apply a 60 Hz AC voltage at 80% of the rated lightning impulse withstand level (typically 75 kV for 12 kV systems) between the fuse terminals and ground. Leakage current must remain below 10 mA for 60 seconds. A sudden rise or intermittent flashover signals internal carbonization of the quartz sand, which reduces the arc-quenching capability.
Yinrong engineers emphasize that this test must be performed with the striker pin in its final position. If the striker has already fired, the dielectric clearance is compromised—do not proceed; replace the fuse immediately.
Phase 4: Timing and Striker Pin Function Check
For fuses equipped with a striker pin indicator (standard on all Yinrong XRNT models), actuate the manual test button (if available) or measure the striker protrusion. After a genuine fault, the striker should have fully extended by 8–10 mm. If the striker is stuck mid-travel, the mechanism suffered debris ingress, and the 192×51mm XRNT High Voltage Current-Limiting Fuse cannot guarantee future operation timing. Use a digital caliper to record the exact stroke.
Comprehensive Test Summary Table
| Test Stage | Equipment Required | Pass/Fail Threshold | Time Required |
|---|---|---|---|
| Visual inspection | Magnifying glass, flashlight | No cracks, burns, or looseness | 5 min |
| Micro-ohmmeter (DC) | Ductor / DLRO-10 | R ≤ 1.2 × baseline | 3 min |
| AC dielectric withstand | 100 kV test set | Leakage < 10 mA @ 75 kV | 2 min |
| Striker pin stroke | Digital caliper | 8–10 mm full extension | 1 min |
| Contact resistance repeat | Micro-ohmmeter | Stable within 2% of pre-test | 2 min |
Expert FAQ – 192×51mm XRNT High Voltage Current-Limiting Fuse
Q1: Can the 192×51mm XRNT High Voltage Current-Limiting Fuse be tested in-circuit without removing it from the holder?
A1: No. Yinrong strictly advises against in-circuit testing for post-fault diagnostics. The holder and connecting cables introduce parasitic resistance and capacitance that skew micro-ohmmeter readings by up to 30%. More critically, the dielectric withstand test requires complete isolation from upstream and downstream equipment to prevent back-feeding risks. Always de-energize, ground, and physically disconnect both terminals before performing any electrical test on the 192×51mm XRNT High Voltage Current-Limiting Fuse. The only exception is the visual inspection, which can be done with a thermal imaging camera from a safe distance while the fuse is still mounted, but this provides only preliminary data.
Q2: How many fault events can a 192×51mm XRNT High Voltage Current-Limiting Fuse survive before it must be replaced, even if it passes all tests?
A2: This is a nuanced question. The 192×51mm XRNT High Voltage Current-Limiting Fuse is designed as a "one-shot" device for major short-circuit faults (above 10× rated current). However, for minor overcurrents (1.5× to 3× rated) that do not fully melt the element, the fuse may endure 2–3 such events if the duration is below 0.1 seconds. Based on Yinrong’s accelerated aging tests, the cumulative I²t stress degrades the silver-sand interface. Our rule is: after three recorded fault events of any magnitude, replace the fuse regardless of test results. The thermal cycling alone causes micro-cracks in the quartz filler, reducing its arc-extinguishing efficiency by approximately 40% on the fourth event. Always check the fault log—if the fuse has tripped more than twice, do not reinstall it.
Q3: What is the correct sequence if the dielectric withstand test fails on a 192×51mm XRNT High Voltage Current-Limiting Fuse, but the visual and resistance tests passed?
A3: This scenario indicates internal moisture ingress or partial carbon tracking along the inner wall of the fuse tube—a hidden failure mode that visual inspection cannot detect. Immediately mark the 192×51mm XRNT High Voltage Current-Limiting Fuse as "unserviceable" and quarantine it for failure analysis. Do not attempt to "dry out" or recondition the fuse; the quartz sand’s hygroscopic properties have been compromised. Yinrong’s forensic team has observed that in 92% of such cases, the root cause was a damaged end-seal gasket from previous mechanical over-torquing during installation. To prevent recurrence, use a calibrated torque wrench (set to 25 N·m for this model) during replacement. Finally, inspect the fuse holder’s internal spring contacts—if they show corrosion, replace the entire holder assembly, as the moisture source may be external.
Final Recommendation and Contact
Post-fault testing of the 192×51mm XRNT High Voltage Current-Limiting Fuse demands discipline, correct instruments, and a conservative decision threshold. A fuse that passes all four stages can be returned to service with confidence, but any single failure—especially in the dielectric test—mandates immediate replacement. Yinrong provides certified test kits and on-site training for your maintenance teams, ensuring every 192×51mm XRNT High Voltage Current-Limiting Fuse in your network operates at peak reliability.
For a detailed testing checklist, custom calibration sheets, or to schedule a technical review of your fuse protection strategy, please contact us directly through our website or regional support hotline. Yinrong engineers are available 24/7 to assist with failure analysis and replacement sourcing. Do not compromise on safety—reach out today for a no-obligation consultation.